


Things We Learned On Our Path to Gardening Success
As new-bee gardeners, we found the whole process of starting a garden to be a bit overwhelming - but its in our blood! We are proud of our English, Irish and Welsh (to list a few) ancestors that came to Canada. Our roots stem from those avid gardeners!

Grandfather to Kim, Great Grandfather to Kyla. William Alderson in his beloved hollyhock garden in Carleton Place Ontario Canada.
Where to start, what types of seeds should we grow, and how to start each of them was not only exciting but interesting to research. Each process of planting, sprouting, transplanting, growth, maintenance, care and the eventual harvesting, was a huge learning curve for us and continues to be so. We think most people new to gardening likely have the same questions, so we're sharing what we have learned over the past few years...If anyone has any questions (and answers) that they were curious about and discovered the best solution to move forward, please email us and we can add that to our list below!
Heirloom Seeds
What is an heirloom seed?
- According to wikipedia...an heirloom plant, heirloom variety, heritage fruit, or heirloom vegetable is an old cultivar of a plant used for food that is grown and maintained by gardeners and farmers, particularly in isolated or ethnic minority communities of the Western world.
- Heirloom is a terminology that describes a seed's heritage; a seed that has a documented heritage, and seeds passed down from generation to generation within a family or community.
How long do heirloom seeds last?
Typically seeds stored correctly will last 3 to 5 years. For short term storage, such as for next year's garden, store seeds in a jar in a cool, dark and moisture free environment. Heirloom seeds stored this way will last 3 to 5 years. For longer storage, place the jars in the fridge and seeds should last 10 to 15 years.
What is the difference between heritage and heirloom seeds?
'Heritage' is a designation that is quite often used throughout the United Kingdom, and means the same as 'Heirloom' used in North America. It is sometimes used to describe an heirloom variety that has cultural or ethnic significance as in Roman beans, as they have a documented history back to Italy.
What is the oldest heirloom seed?
The oldest heirloom seed that grew into a viable plant is a Judean Date Palm seed dating from approximately 2,000 years ago; it was recovered during an excavation at Herod, from the site of The Great Palace on Masada, in Israel. The seed had been preserved in a cool dry place and not by freezing - the seed germinated in 2005.
Is it important to preserve heirloom seeds?
Yes. Researchers have successfully grown dates from 2000 year old seeds recovered from ancient sites in the middle east. It shows that farmers were selectively breeding dates from around the region and could give clues as to how dates have survived for millennia.

- Many gardeners prefer heirloom seeds because they are open-pollinated, which means you can save your own seed to replant from year to year. Seeds saved from heirloom flowers, vegetables and herbs, will produce plants that are true to type, unlike hybrid seeds. It is also said that heirloom seeds last longer than hybrid or GMO seeds, under the right storage conditions.
Seed Needs
What are 3 conditions that seeds need to grow?
Seeds remain dormant until conditions are right for germination. All seeds need water, oxygen and proper temperatures to germinate. Some seeds also need light. Some seeds germinate better in full light while other require darkness to germinate.
Should you refrigerate seeds before planting?
If you are not planting your seeds right away it is often recommended to store your seed packets under cool conditions by placing them in a refrigerated plastic container. This will not cold stratify seeds if they are kept dry.
Are seeds still good if they freeze?
Yes. Freezing does not harm seeds and may extend their life span if done correctly. Did you know that all seed banks freeze their seeds that are intended for long term storage? Humidity is the main concern with freezing; a blast of warm humid air on frozen seeds can damage them and affect germination.
Do I use hot, warm or cold water to soak seeds?
Warm water
What seeds should be soaked before planting?
- Soaking the seed enables the new growth from the inside to push through the hard shell and grow. Seeds that benefit from soaking include chard, peas, beets, cucumber, corn, squash, pumpkin and beans. Place the seeds in a bowl, cover with warm water and leave to soak from 8 to 12 hours - no more than 24 hours.
- Smaller seeds and those with thinner coats need shorter periods to soak; larger seeds with thicker coats need longer. Soaking hard coated seeds in coconut water is also an option, as germination is an enzyme driven process, and the coconut water provides a food/energy source to wake up tired embryos and get them germinating.
Can I plant older seeds that were soaked?
Yes. Once the older seeds are soaked and ready, place them directly into a larger pot or prepared garden area with good quality organic seed propagation mix rather than on a paper towel. Direct planting avoids injury to the taproots very fine feeder hairs during transplantation and increases its chance of survival.
Can I use hydrogen peroxide to soak seeds?
Yes. The seed coat softens by soaking in a properly diluted hydrogen peroxide solution; this allows the seeds to absorb more oxygen and increases the germination speed. Hydrogen peroxide, which is chemically similar to water, is one of the safest chemicals you can use in the garden to combat root rot.

How do I successfully germinate seeds with hard coats?
- Soaking the seed enables the new growth from the inside to push through the hard shell and grow. Some people recommend soaking the seeds in a 1 or 2 percent hydrogen peroxide solution for a few minutes to clean the seed surface and eliminate any mold spores that may be on them; this process also provides a mild chemical scarification which enables the seed to exchange oxygen - many gardeners follow this with a light sanding with a bit of sandpaper or they 'nick' the seed coat carefully to give start the process of germination a little nudge.
- Sometimes you may have to resort to removing the seed coat altogether, and try to directly germinate the embryo by placing the naked seed on top of a sterilized seed starting mix that is kept evenly moist.
- Soaking hard coated seeds in coconut water is also an option, as germination is an enzyme driven process, and the coconut water provides a food/energy source to wake up tired embryos and get them germinating.
- Once the seeds are ready to plant, place them into the soil. Direct planting avoids injury to the tap root's fine hairs that typically occur during transplantation.
Will my seeds still germinate if I forgot to soak them before planting?
Yes. If you forgot to soak your seeds prior to planting, they will still sprout if you keep them moist - this will increase their germination success. Soaking decreases the germination time but your seeds will eventually sprout.
What seeds should not be soaked before planting?
Soaking the seed enables the new growth from the inside to push through the hard shell and grow. Seeds that should not be soaked prior to planting include carrots, lettuce, radish, celery, spinach and turnips.

What is the most cost effective way to start seeds indoors?
Some people recommend using damp paper towels, napkins and coffee filters and say these can all be used to germinate seeds indoors. Place the seeds on a damp paper towel and place this in a plastic ziplock bag. store in a cool dark place to encourage speedy germination. Once the seedlings are sprouted, transfer them into loose potting soil.
Can I start seeds in an unheated basement?
Yes. A dark basement is good for growing; a workshop light is good for seedlings. Seedlings will grow stockier in a cool dark basement with temperatures around 50 degrees. Warmer temps will encourage faster growth but without good light, seedlings will grow taller and 'leggy'.
What is the best material to start seeds in?
Seeds have enough power inside themselves to germinate, the nutrients essential to healthy growth aren't usually present in soil. The best medium to use for germination is a soil-less mix. We at bumbleseeds follow the advice of Monty Don (Gardeners World host), and we do not use promote the use of peat - we also prefer to use vermiculite, perlite and/or coconut coir as these materials are environmentally more sustainable than peat moss. This mix provides good drainage, light weight and inhibits diseases.
Can egg cartons be used for starting seeds?
Yes. You can re-use egg cartons as a seed starting tray. And you can cut or pull apart the sections and plant the whole little section - they are biodegradable. Simply poke a few small holes for drainage, and put the cartons on a tray or in a shallow pan to ensure sturdiness of the carton once wet. Same idea with paper towel rolls or toilet rolls - completely biodegradable!
Can I use lemon and orange skins to start seeds in?
Yes. Lemons and oranges cut in half make perfect starter cups for seedlings. Cut in half, place on a small saucer. Poke a hole in the bottom of the 'cup' for drainage, fill with soil, plant the seed to the desired depth and water lightly. Plant into the garden as is; the skin will decompose. Orange peels are full of nitrogen - essential to good fertilizer! The citrus peels will release nitrogen. Whenever your soil needs a boost, you can add ground up orange peels.
Should I cover the seeds with plastic wrap?
Yes. You can cover the pots or trays with plastic wrap or a plastic dome that fits over them to speed up germination and keep the moisture in. It is important to ensure timing - ensure you are able to transplant outdoors after all risk of frost has passed before they get too tall and leggy and require nutrients from the soil. When you see the first signs of green remove the plastic.
Can I make my own seed tape?
Yes. You will need paper towel, Elmer's Glue (must be Elmer's, disposable and non-toxic) scissors, a pen or marker, and your desired seeds.

My mom, Kyla's Grandmother, Kathleen Rawlins in her wildflower garden.
Problem Solving and Solutions
Does vinegar help seeds grow?
NO. Vinegar is an aqueous solution of acetic acid that can destroy the seed's vigour and inhibit its germination.Vinegar will kill the seed, leaves and plant - as such makes a great natural weed killer!
Can seeds with mold still grow?
Yes...if mold is addressed. Mold will not kill your seedlings. But it is a sign that there is a problem and it needs to fixed ASAP; whatever is causing the mold to grow will likely affect the seed life.
Does Cinnamon prevent mold on seeds?
Yes. Cinnamon is anti-fungal and antimicrobial and prevents fungus growth, and the problems that can lead to dampness and seed failure. Sprinkle cinnamon lightly over the moistened trays of soil.
Does Epsom Salt make seeds germinate faster?
Yes. Epsom salt helps seeds germinate.
- Magnesium in the salt activates the enzymes in the seed which break down the inbuilt food supply so the plant will germinate and establish much more quickly. Add a teaspoon of Epsom salt to a watering can and water the newly sown seeds. This only needs to be done once.
- Epsom salt also makes plants grow bushier, produces more flowers, increases chlorophyll production and deters pests, such as slugs and voles. It also provides vital nutrients to supplement your regular fertilizer.

Is it true that a water feature is beneficial to the garden?
Yes. We found it to be very good at attracting birds. We also made several ponds with sticks as an egress for insects. And we made shallow water containers with rocks for bees to access water. Water is important to all living things and specifically in hot weather periods. Having a source of water attracts birds who are excellent predators for bugs etc.
Are eggshells good for the soil?
Yes. Eggshells are an organic material and are full of calcium; the shells will decompose in the soil and helps plants thrive. Circling slug loving plants with broken cracked shells is said to inhibit slugs and protects the plants. You can also use half shells to start seeds! We also add coffee grinds ( great source of nitrogen) to the base of our trees which seems to make them happy.
I have excess styrofoam and plastic. Can I use these in the garden?
Yes. Most potted plants do not require deep roots. Place packing peanuts in the bottom of larger containers. This makes for better drainage because the styrofoam will absorb the excess water.


- You can also reuse plastic milk jugs. Empty and wash out the jug if you want to cold stratify seeds outside; pierce the side of the jug at the base of the handle. Use scissors to cut around the entire jug to the other side of the handle but not cutting through as this will act like a hinge. Fill with earth and sow the seeds to the desired depth. Water in gently. Place the top half back down to meet the lower half's rim and duct tape into place. Set outside in a warm place. Ensure it does not dry out. Transplant seedlings once they have have two true sets of leaves and all risk of frost has passed.
- Plastic drinking bottles and containers can also be used as mini greenhouses. Cut bottles in half (same as above) and follow process. Place on a warm windowsill and transplant when ready. Plastic containers are perfect for starting seeds - place the top over planted seeds and moistened soil and transplant when ready.
- Glass wine bottles are perfect for slow watering. Simply wash out a wine bottle and drill a small hole in the cork. Fill the bottle with water, pop the cork in and stick it upside down in the pot and it will slowly release the water into the soil.

Is there a natural chemical free solution to weeds?
Yes. Sprinkling salt on weeds typically causes them to shrivel up - the salt dehydrates them.
Vinegar is also effective as it is acidic, and will eventually kill most broadleaf weeds - the acid will kill the leaves before reaching the root system, and the weeds may grow back quickly. For longer-lasting removal, mix 1 cup of table salt with 1 gallon of vinegar. Salt dries out the weed's root system.
OR try a mixture of white vinegar, salt, and liquid dish soap is also effective. Each of these ingredients has special properties that combine to kill weeds. Both the salt and the vinegar contain acetic acid, which serves to dry out and kill the plants.
Add the vinegar, epsom salt and dawn to a large bottle with a sprayer or a lid with holes in it to squirt the solution out. Allow the solution to settle for about 2 minutes then spray this onto the weeds. Make sure you soak the entire weed with the formula. Let this sit for a day and reapply if needed.
Pests. Is there a chemical free solution for pests?
Yes. There are chemical free alternatives. Throw away the Round Up!
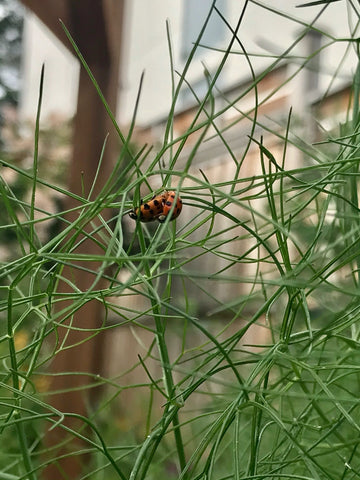
Firstly, it is always best practice to plant plants that attract beneficial predator insects. Attracting predatory insects to your garden is the best natural defence you can provide. For instance, ladybugs feed on aphids; planting fennel will not only attract ladybugs but it will provide a food source, a place for them to reproduce, and where they can lay eggs. Ladybugs devour aphid populations rapidly; we plant fennel to ensure their survival!
Planting certain plants for their scent is also beneficial for attracting and repelling predatory insects. Marigold flowers are colourful additions to landscaping, and they have a distinctive smell that repels mosquitoes and other garden pests, including squash bugs and tomato worms. Marigolds contain a natural compound used in many insect repellents.
Chrysanthemums produce a natural chemical called Pyrethrum, which is used in the majority of insecticides, indoor sprays, pet shampoos and aerosol bombs. Pyrethrum repels roaches, mosquitoes, beetles, ants, tick, silverfish, lice, fleas, bedbugs, spider mites, harlequin bugs and root-knot nematodes.
Interestingly enough, the only insects you see around lavender are bees-they love the flowers. Lavender has a pleasant scent that comes from the essential oils in the leaves of the plant, however, lavender is also an effective deterrent as the strong scent can repel moths, flies, fleas, and mosquitoes. Use it fresh or dry some of the flowers to hang around the house or put in with your clothing to keep bugs out!
Bugs:
- Insects hate clove oil, patchouli, peppermint, and geranium.
- Typically bugs can be repelled using: lemongrass, citrus, peppermint, eucalyptus, tea tree, citronella, catnip, and lavender oils all possess properties that repel bugs. The oils can be used individually or combined to make a simple anti-bug potion. Mix 1 cup of water with 25 to 30 total drops, of an oil listed above, into a small spray bottle. Spray as needed and reapply after rains.
- Or an alternative effective bug deterrent can be made using 1 glass of water, 1 tablespoon of canola oil and a splash of dish soap. Spray on plants and reapply after rains.
- Mosquitoes hate citronella, lavender, lemon eucalyptus, basil, mint and garlic. Tiny flies are repelled by citronella, lemongrass, and rose geranium.
Ants and flies:
- dislike mint, basil, and bay. The pungent nature of mint deters most bugs. Ants will avoid mint plants whenever possible, and it can also help with other menaces like roaches, spiders, and flies.
- Ants can also be deterred by cinnamon; sprinkle plants lightly and reapply after rains.
- These little buggers will avoid lemon and/or eucalyptus.
Mice and rats:
- Peppermint oil, cayenne pepper, pepper and cloves.
- Mice can be kept away by planting plants that exude, and/or using the smells of peppermint oil, cinnamon, vinegar, citronella, ammonia, bleach, and mothballs. Soak some cotton balls in oils from one or more of these and leave the cotton balls in places where you've had problems with mice.
- Grating Irish Spring soap and scattering these around plants or where mice and rats are frequenting is also said to drive them away.
Slugs:
- Beer. Pour a beer into a dish and place it in the garden. It will attract slugs away from your vulnerable plants. Empty and repeat as needed.
- Eggshells circled around plants also help deter slugs as they wont crawl over the sharp shells.
Deer and rabbits:
Cute...yes. Pain in the beehive - absolutely! Fencing has to be 8 ft and higher to deter deer...mostly. They are clever and will get into any garden if they can see the other side of the fence. Generally the best advice is to not plant what they like to eat. And, if you do...have back ups and lots of them! There are many numerous varieties of deer 'resistant' plants available. Do your research, and at best, take it with a grain of salt - if they're hungry they will likely eat it. As far as rabbits go...try sprinkling dried sulfur around or on your plants; they also dislike the smell of onions, so we plant them around our garden beside things they ate the year before-lessons learned. It was suggested that we try dusting our plants with talcum powder but so far we haven't tried it. We found some success with using plastic fencing attached all around the garden with wood supports to weigh them down...so far so good!
There are so many plants that you can use to attract or detract insects; do your research and find out what you can bring to your garden to make it a natural and diverse ecosystem that benefits everyone and everything by not using chemicals.
Helpful Hints
What is the best storage solution for seeds?
Storing seed packets in a cool dark moisture proof place is essential - an air-tight mason jar seals them and enables them to be stored until use. Vegetable and flower seeds may be kept for one year without a huge depreciation in germination; storage can be extended to 10 or more years under the proper conditions such as moisture proof containers, ziplock bags and glass airtight jars.

For smaller seed collections, store seeds in glassine packets or paper packets and place in a ziplock baggie. Place anywhere that is cool and dark for seed storage until use.
Can plants be used as a Salt Substitute?
Yes. In particular, culinary lavender can be added to almost any dish; it is full of Ursolic acid which is a nutrient that may help fight cancer and burn more calories! Why not concoct your own unique blend of salt alternative seasonings - combine lavender, thyme, chives, fennel, rosemary and any other herbs you like.
Baking soda for sweeter tomatoes?
Yes. Baking soda is reported to be a great way to make your tomatoes sweeter tasting. Sprinkle the powder around the base of the plants - avoid the roots and leaves. Or mix 1 teaspoon of baking soda into 1 gallon of water - mix until dissolved, and pour this around the base without touching the plant.
From Our Garden To Yours...
In our opinion, gardening is a true discovery process. A process that continues to be a fascinating lesson in patience, determination, passion and faith - in our personal growth, and in our gardening! Researching how, what and where to grow is a constant joy for us.

Happy Growing. We Look Forward To Growing With You! Much Success in 2023!